He is Coming: Swampland Guide (Islands, Enemies, Locations)

Image Credit: Hooded Horse Wiki, licensed under CC BY-SA 3.0
Written by Michael Owen | He is Coming
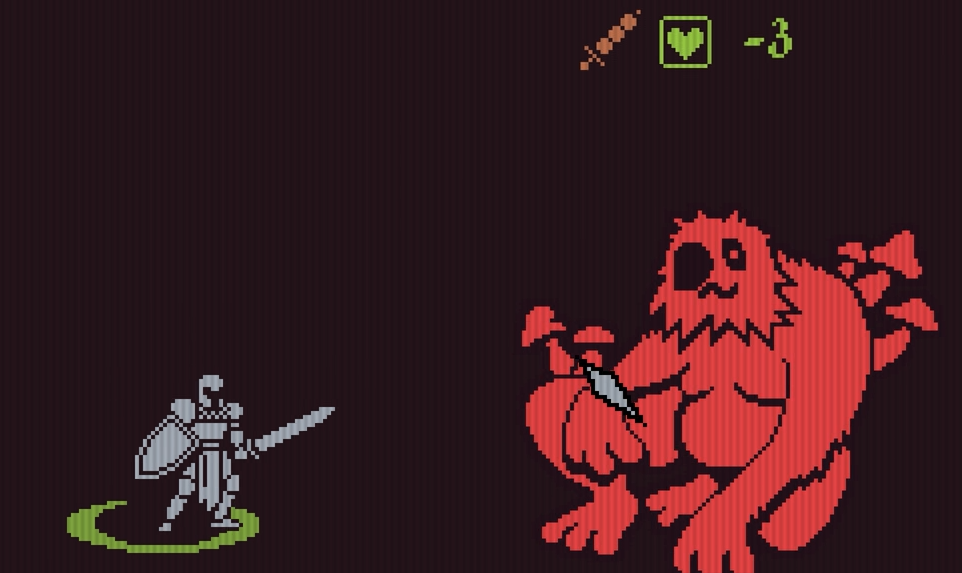
Swampland in He Is Coming is split into multiple islands, each with unique enemies, locations, and item opportunities. Movement is tight, enemies are tougher, and status effects like Poison and Acid are common.
The best strategy is knowing which islands to visit, what to prioritize, and how to survive the swamp with limited steps and healing.
How Swampland Works
Swampland unlocks after beating a Woodland run. The map is divided into islands connected by Ferrymen. Each Ferryman gives you three island choices. You cannot return once you leave an island.
Enemies are stronger than in Woodland. Many fights are built around status damage, armor shredding, or healing block. Food fusion, armor scaling, and first-strike builds become more important.
General Map Locations
Bargaining Tent
Buy 2 Rare items for 5 gold. You can haggle with a 75 percent chance to lower to 4 or a 25 percent chance to raise to 7.Blade Oil
Pick 1 bonus for your weapon: Attack, Armor, or Speed. Can only be applied once. Resets if you change weapons.Campfire
Rest at night and heal 10 HP. Useful for light damage recovery without wasting food.Cauldron
Fuses two food items into one. Add a Honeycomb to double the effect. Use early and often.Chest
Choose 1 of 3 Common items. Higher chance for Golden in Lush Chests. Always check early-game Chests.Crone
Pick 1 of 2 cursed items. Risky but powerful. Only take if your build can absorb the drawback.Fairy
Swap 1 item for another of the same rarity. Great for fixing junk drops or rerolling failed gear.Ferryman
Takes you to one of three other islands. Choose based on enemies, healing needs, or missing gear.Forge
Apply 1 of 2 edge bonuses to your weapon. Overwriting costs 10 gold. Best used after finding a weapon you plan to keep.Golem
Combine two items of the same rarity. Good for cleaning up inventory or getting stronger passives.Large Golem
Upgrade a normal item to Golden or a Golden item to Diamond. Save this for strong synergies.Large Bonfire
Rest at night and heal to full. Found only in Scorched Hill. Plan to visit if you are low on food.Lush Chest
Choose 1 of 4 Common items. Has a 1 in 100 chance for Golden. Found in Lushwood Grove with no enemies.Rune Stone
Pick between Blood Rune, Echo Rune, or Iron Rune. Useful for trait-based builds.Sinkhole
Takes you to a random island. Use only if stuck or desperate.Treasury
Gain 3 gold instantly. Found in Sunken Palace. Visit before Forge or Bazaar.Weapon Pile
Pick 1 of 3 weapons. Found in Abandoned Quarry. Useful if your current weapon is weak or untagged.Woodcutter
Combine any 2 items into a random Heroic item. Roll the dice if nothing in your build is working.Beehive
Grants 1 Honeycomb. Always guarded by Honey Bees. Worth it for food builds if you can survive the fight.
Swampland Island Strategy
Starting Island
Enemies: Frog, Snake
Locations: Home (heals to full at night)
Advice: Use this safe zone to build early momentum. Loot all Chests. Avoid Ferryman until you're confident.
Abandoned Quarry
Enemies: Frog, Beaver
Locations: Weapon Pile
Advice: Visit if you need a better weapon. Some builds start weak and need early replacements.
Glyph Ruins
Enemies: Beaver, Turtle
Locations: Ancient Tomes, Rune Stone
Advice: Grab a Rune here if your build scales off Iron or Echo. Turtle enemies hit hard, so come prepared.
Golem Home
Enemies: Beaver, Slime
Locations: Golem, Large Golem
Advice: Bring duplicates to combine or upgrade. Great island mid-run once your inventory is full.
Lushwood Grove
Enemies: None
Locations: Fairy, Lush Chest, Beehive
Advice: A must-visit if you are low on health. Safe rerolls and strong loot. Only approach the Beehive if you can tank or avoid poison.
Scorched Hill
Enemies: Dragonfly, Slime
Locations: Woodcutter, Large Bonfire
Advice: Risky zone with decent reward. Use Large Bonfire to recover if your run is bleeding. Only use Woodcutter if your gear is weak or mismatched.
Sunken Palace
Enemies: Palace Guard
Locations: Treasury
Advice: Grab gold here before heading to Forge or Bazaar. Palace Guards hit hard. Do not enter low on armor.
Witch Marsh
Enemies: Dragonfly, Frog
Locations: Cauldron, Crone
Advice: Fused food is essential in Swampland. Prioritize this island if you have raw food saved. Crone is a risk, but cursed items can change a run.
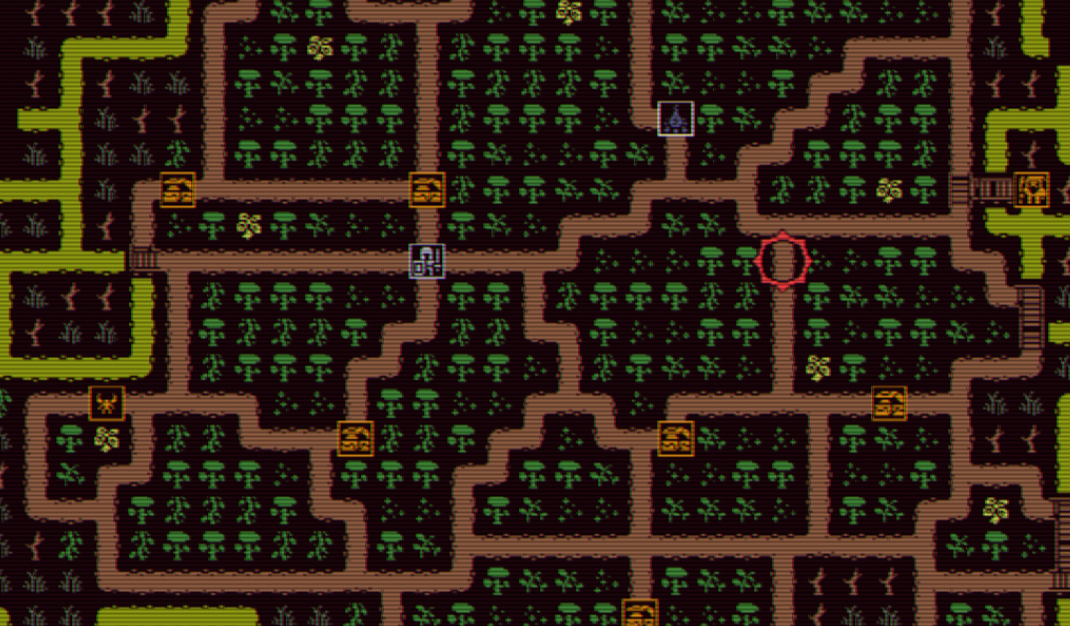
Map of the Swamp
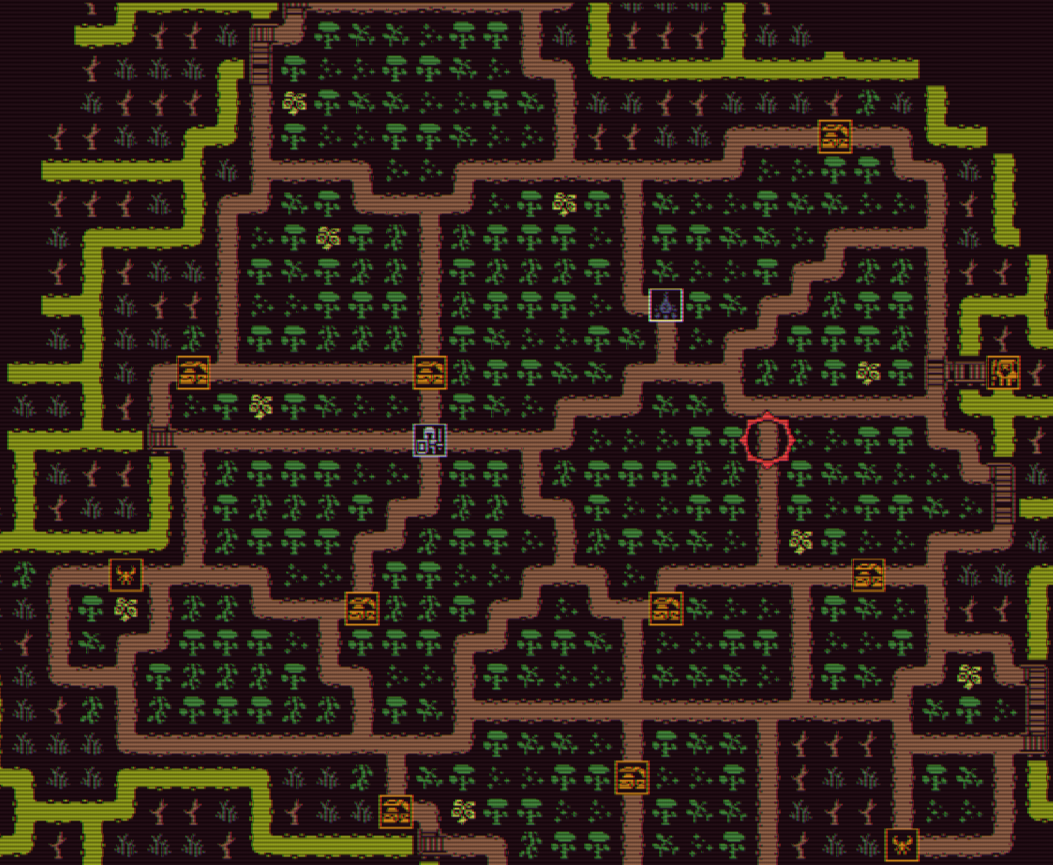
Image Credit: Hooded Horse Wiki, licensed under CC BY-SA 3.0
Final Blurb
Swampland is a test of planning. Each island can fix or end your run. Focus on healing, food fusion, and avoiding enemies with armor shred or poison spam. Use Ferrymen carefully. Make sure each stop helps your build grow stronger, not slower.
FAQ
Can I go back to previous islands?
No. Each island is one-way. Choose wisely.
What is the safest island?
Lushwood Grove. No enemies and three strong loot points.
Which island should I go to first?
Abandoned Quarry is great early if you need a better weapon.
Should I use the Crone?
Only if your build has healing or armor to offset a cursed item.
What does the Beehive do?
It gives you a Honeycomb. Combine it with food at a Cauldron for huge bonuses.
When should I use the Sinkhole?
Only if you are stuck or need to escape a dead end.
Do all islands have a Ferryman?
Yes. You will always have three new options after each island.
© 2025 GamerBlurb. All rights reserved. Feel free to link to or quote this guide; please provide a direct link back for attribution. Content Credit: Portions of this guide include material from the Hooded Horse Wiki, licensed under CC BY-SA 3.0
More He is Coming